

How To Install Shocks And Springs
Switching out your stock springs for aftermarket springs can have a huge affect on your auto. Whether you're going for a sporty feeling, or even just a unlike await past lowering the car, new springs can make your automobile expect and feel unique.
The merely uncommon tool you'll need for this job are the spring compressors. These are special clamps that compress the bound and let yous to remove and install them. Typically, if you don't want to buy them, they tin be rented at your local auto parts store. Don't apply whatever other sort of clamp on the springs or you may damage them. Even tiny fiddling scratches and dents on the leap can seriously compromise its overall strength, then but use spring compressors.
Make sure you buy the correct way springs for your brand and model. Also, proceed in heed that lowering the motorcar also much can cause the tires to rub on the cycle wells, so it's worth it to make a few measurements.
Part 1 of four: Removing the front springs
Materials Needed
- Allen wrench
- Breaker bar
- Hammer
- Affect gun
- Jack
- Jack stands
- New springs, usually in the class of a kit
- Ratchet
- Sockets
- Spring compressors
- Torque wrench
-
Wrenches
-
Tip: It is highly recommend that y'all employ an impact gun for this job equally there are quite a few bolts that y'all will have to remove. Using the affect gun is faster and won't tire you out from turning wrenches all day. Also, if you lot use the impact gun, you won't need the allen wrench.
-
Tip: Take a look in your vehicle repair guide or online to find sizes for all the nuts and bolts as they vary between make and model.

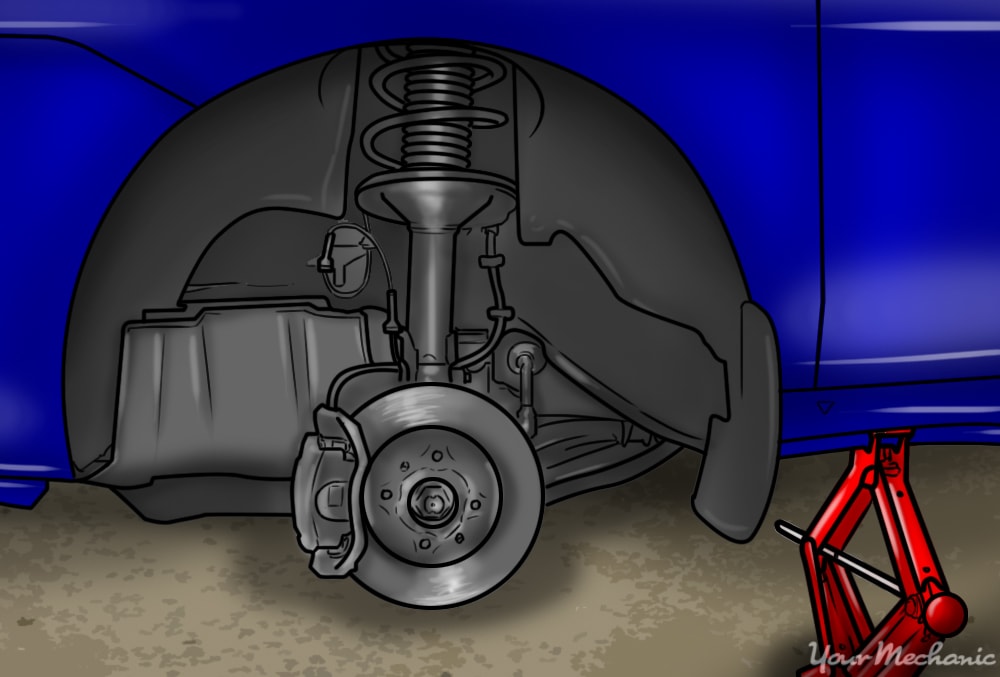
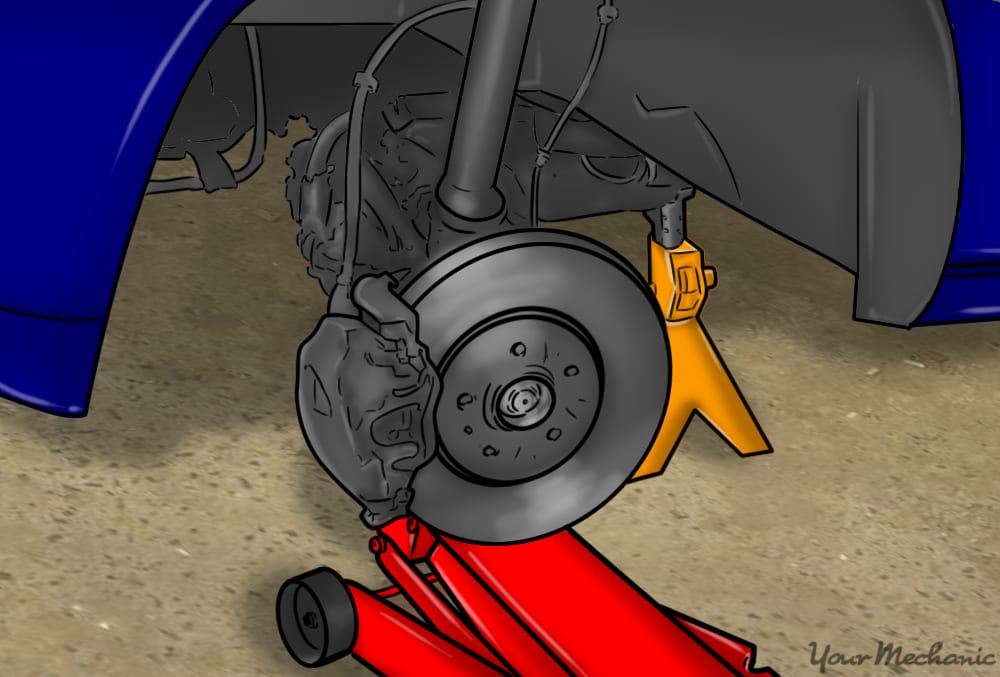
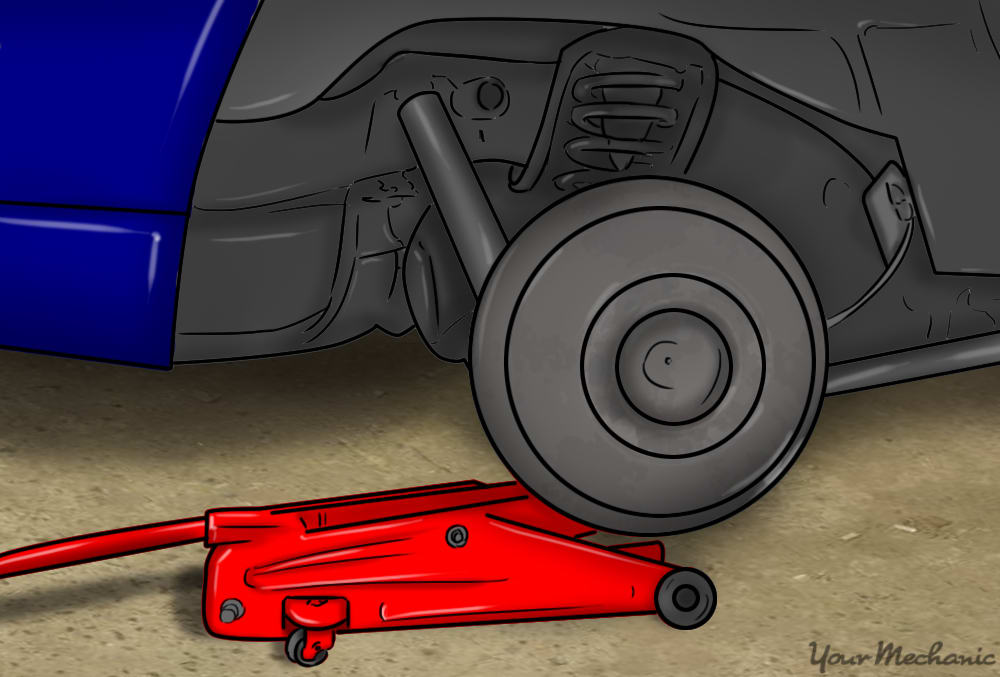
Step one: Jack up the motorcar. In order to remove the wheels and access the leap and shock absorber, you will demand to raise the vehicle.
On a flat, level surface elevator the car up with your jack and lower it on to some jack stands.
- Tip: Be sure to loosen the lug nuts with a billow bar or impact gun before lifting the wheels off the footing. Otherwise the wheels will simply spin in place when y'all try to loosen the lug basics subsequently.
Step 2: Remove the wheels. Most jump compressor kits come up with four springs, and so remove all iv wheels.
If the kit just has 2 springs, or if you don't have enough jack stands, you can practise 2 wheels at a time.
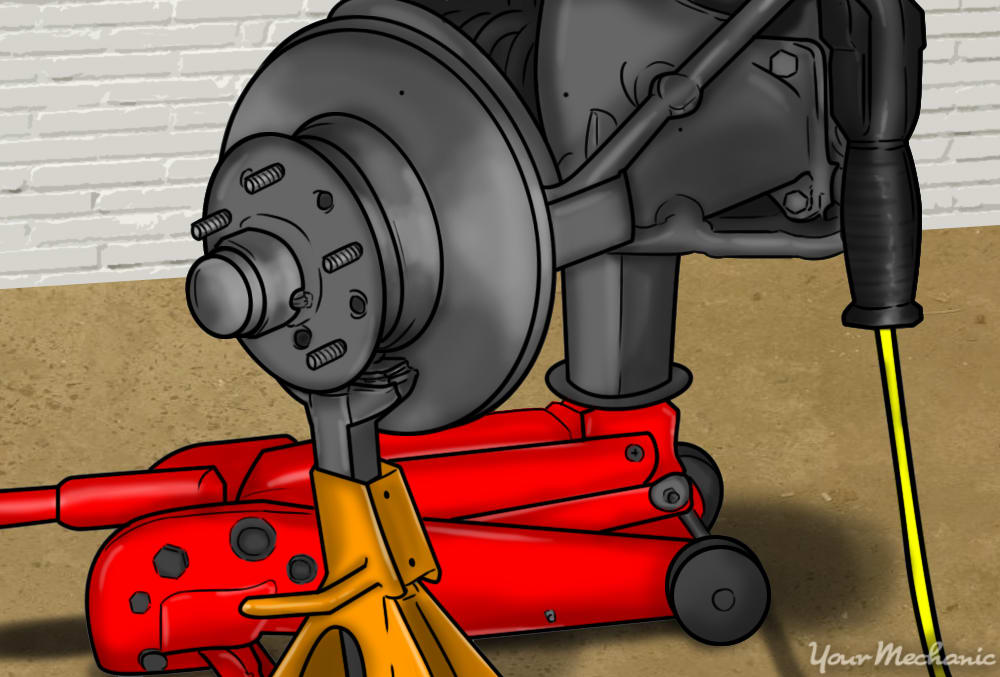
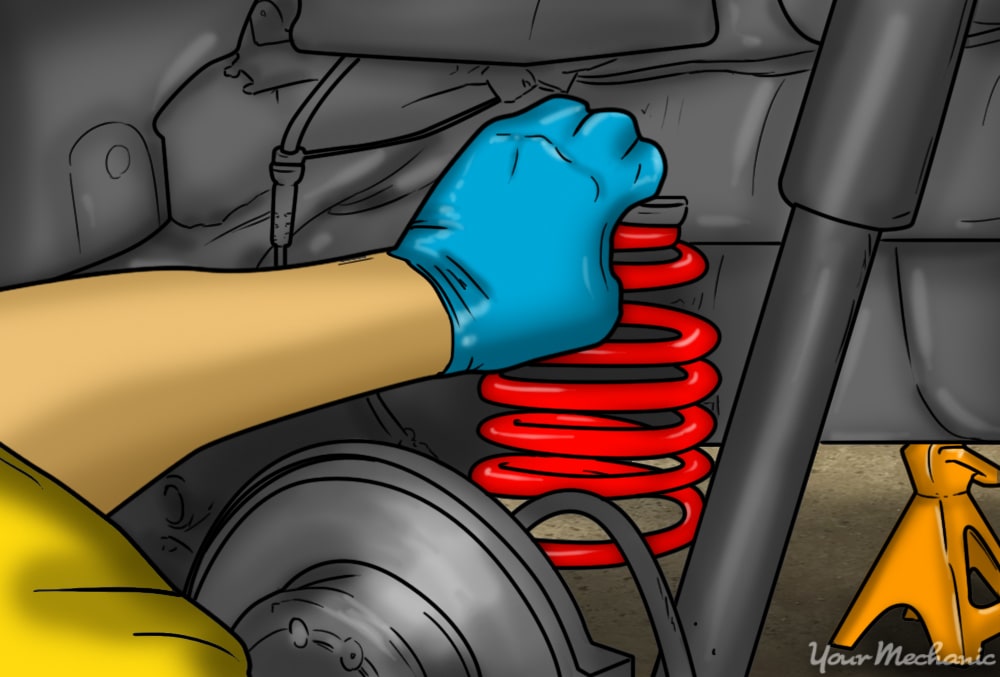
Step 3: Place the jack underneath the lower control arm. Starting with one of the front wheels, use the jack to enhance up the whole wheel hub slightly.
This will help support the lower control arm so it doesn't fall later when you lot remove some nuts and bolts.

Pace 4: Remove the bottom bolts that hold the shock absorber on the cycle hub. Use a wrench to hold i side while you undo the other with a ratchet or impact gun.
The bolt tin sometimes be difficult to remove in one case the nut is off, but you can employ a hammer to lightly tap information technology out.
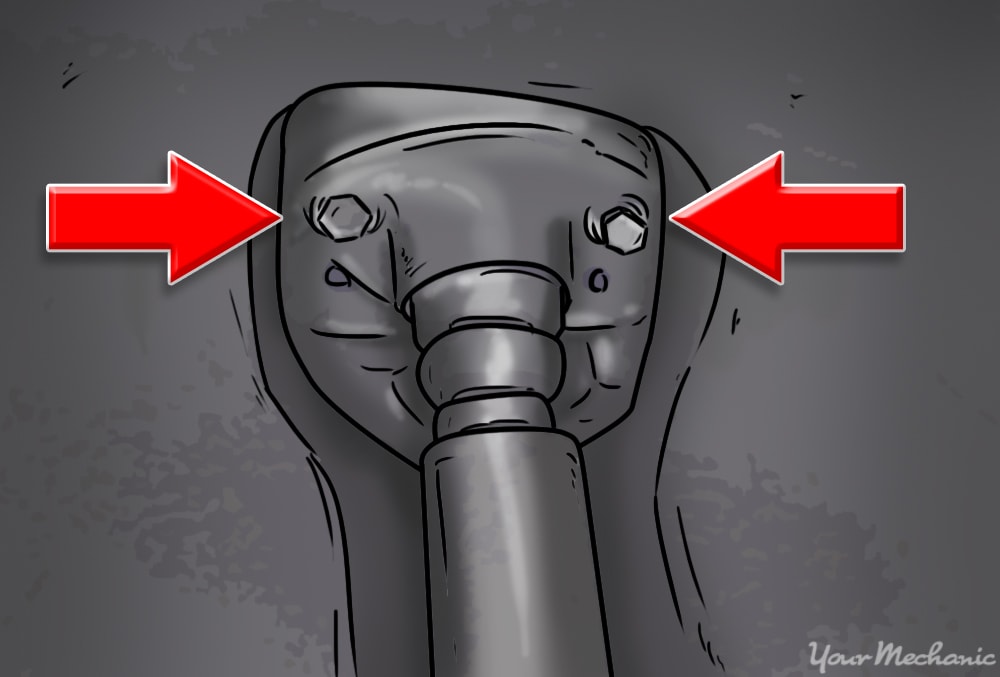
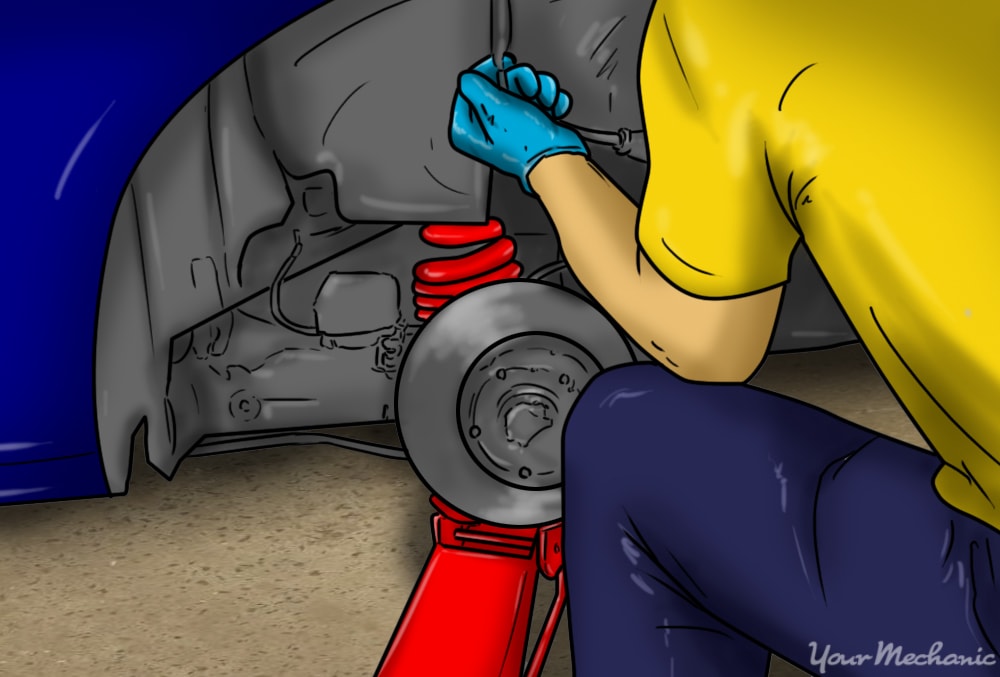
Step v: Remove the mounting nuts at the acme of the strut. Remove the nuts that concur the elevation of the strut to the trunk of the machine.
If y'all don't have an impact gun, you may need an allen wrench and deep offset wrench to loosen the pinnacle mounting.
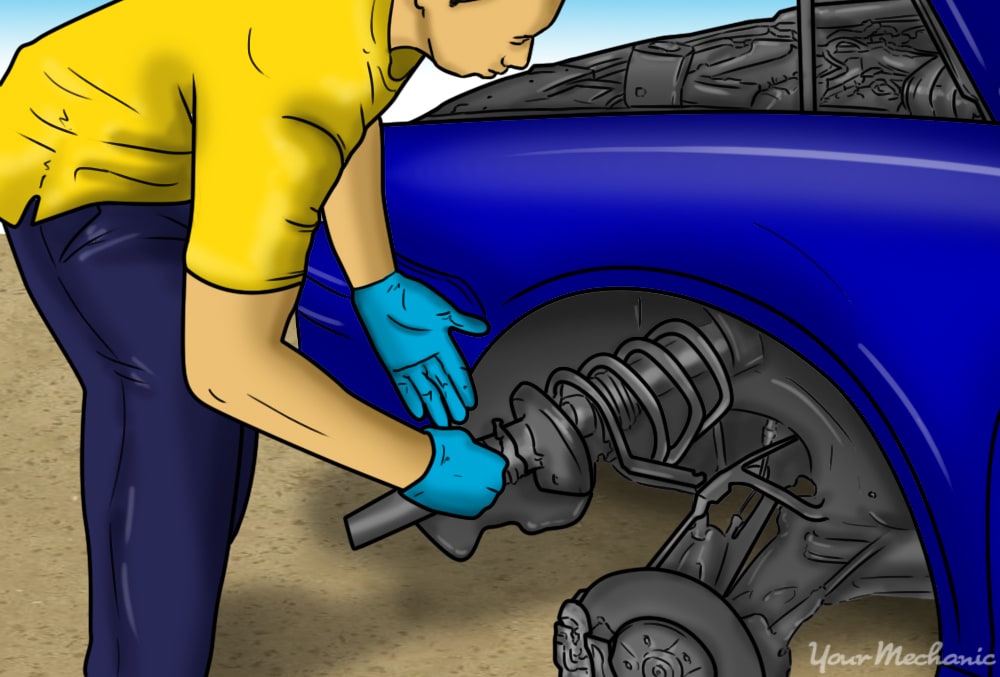
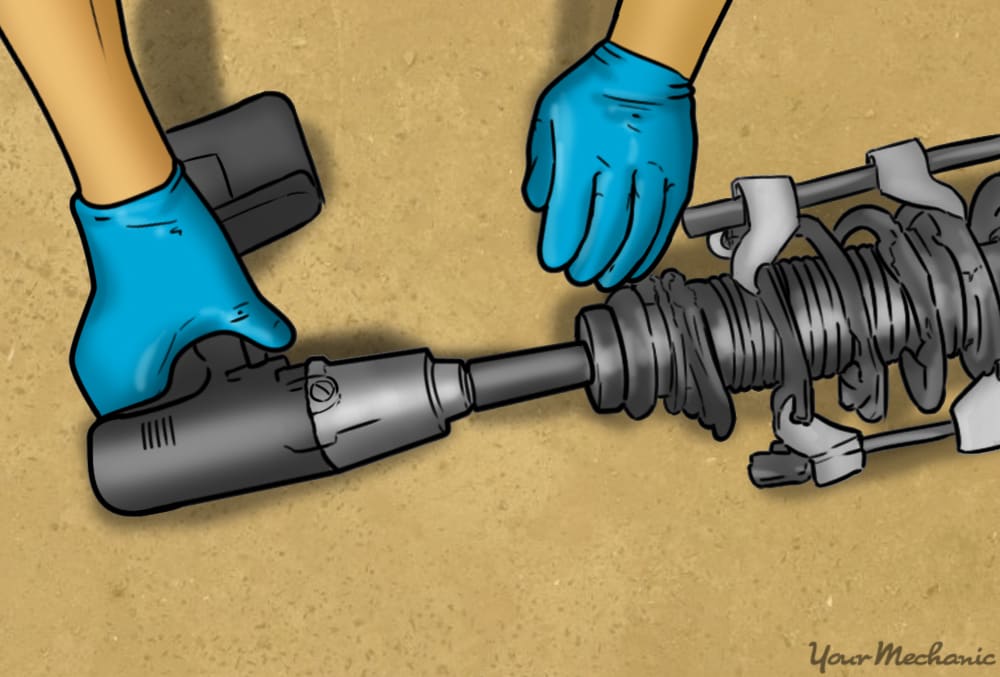
Step 6: Remove the strut. With the bottom and elevation mounting bolts removed, you tin remove the whole strut associates.
You tin lower the jack slightly to let the control arm drop. Information technology should come up out of the peak of the bike hub without too much trouble, only you lot may demand to tap the wheel hub with a hammer to dislodge the connection.
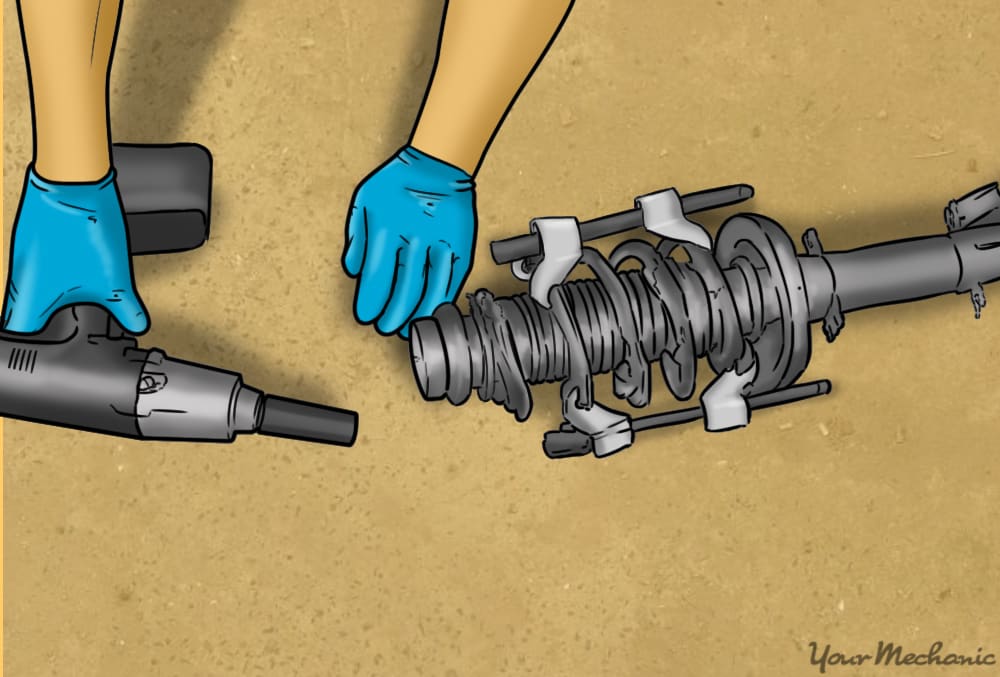
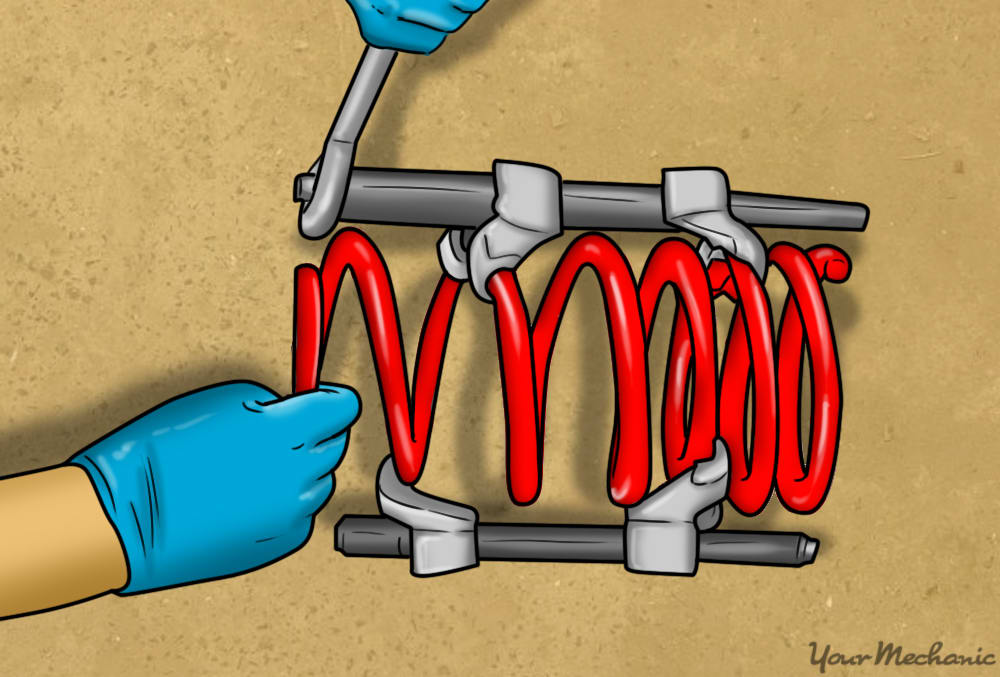
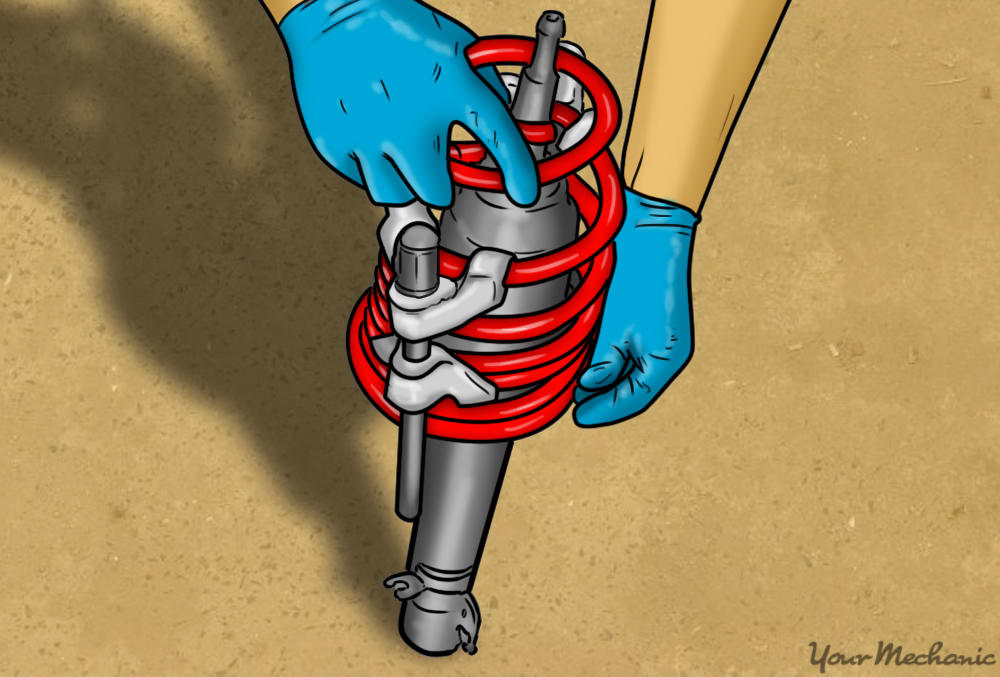
Step 7: Compress the springs. With the whole strut assembly removed, you will need to compress the springs to relieve the pressure then you can remove the top retaining nut.
Apply two jump compressors, each on opposite sides of the bound, and tighten each little by picayune until you can spin the pinnacle mount freely. Having an impact gun for this part makes the job much easier and faster.
- Warning: If you don't compress the springs earlier unscrewing the retaining nut, the pressure from the springs will crusade the superlative to shoot off and can hurt y'all or others effectually yous. Always compress the springs earlier removing the retaining nut.
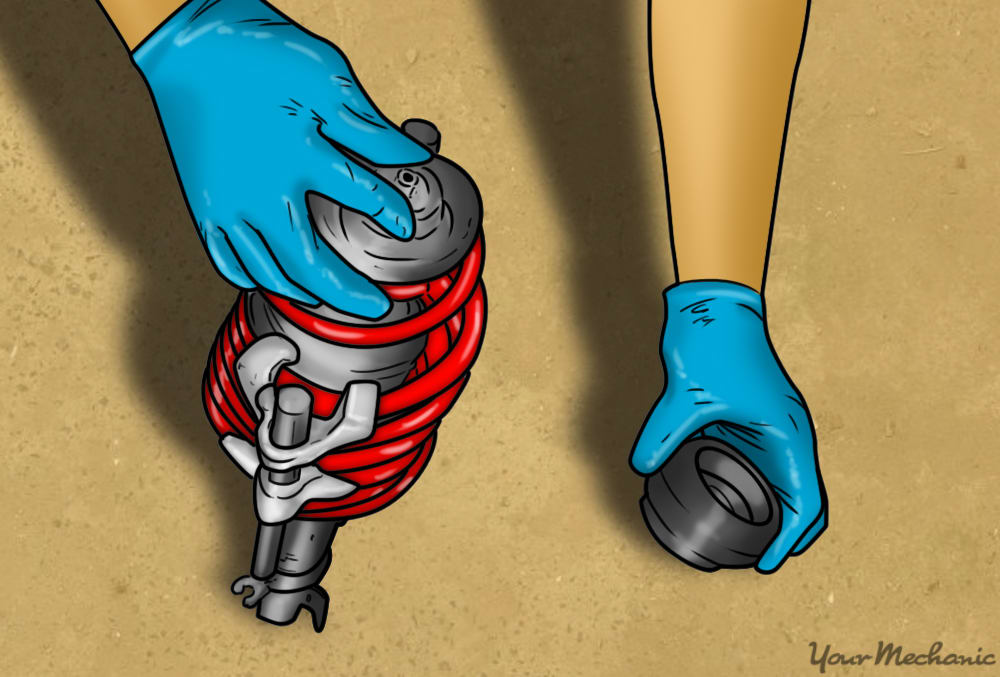
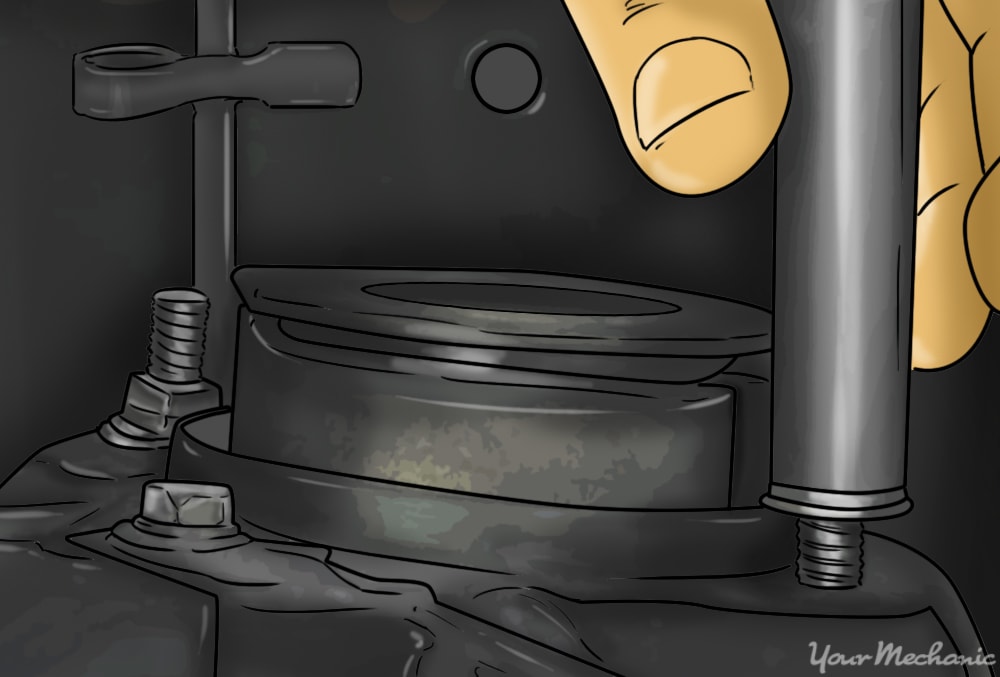
Step 8: Remove the retaining nut. With the springs compressed, yous can safely remove the retaining nut.
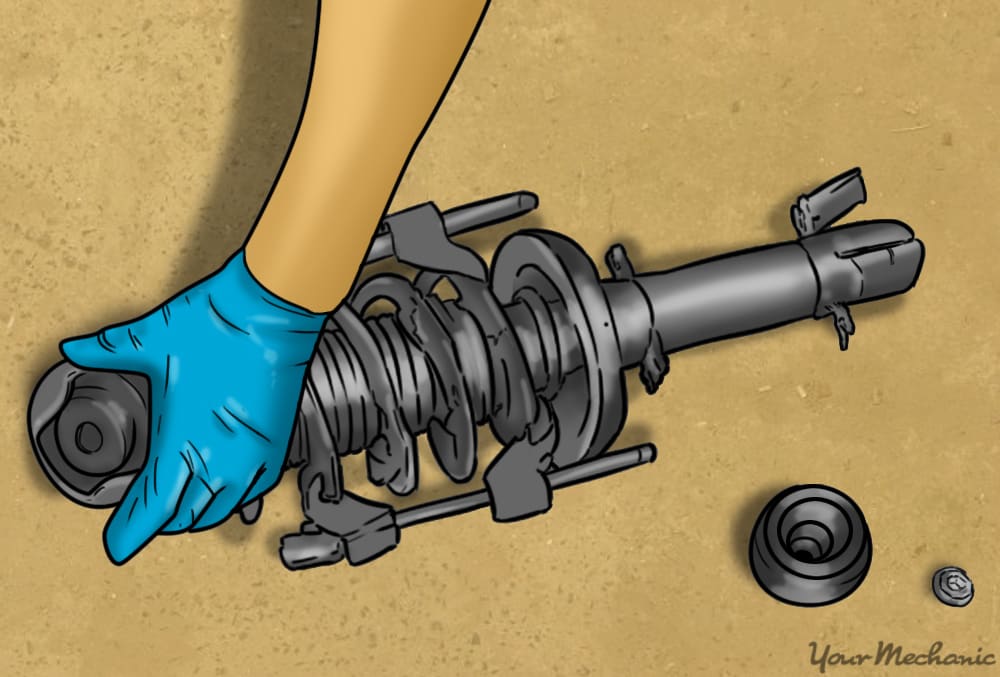
Step nine: Remove all of the mounting pieces. Typically at that place will be a safe dampener, a begetting to let the strut rotate, and a top seat for the jump. Remove each of these pieces.
Be sure to save all the pieces and lay them out then you can put them on the new springs in the exact aforementioned style.
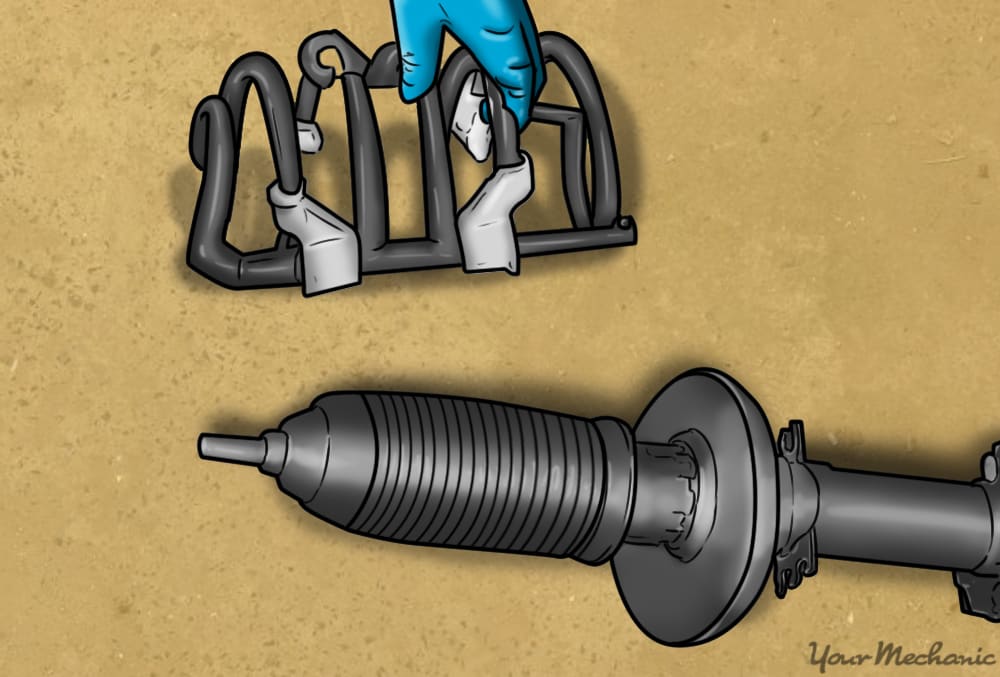
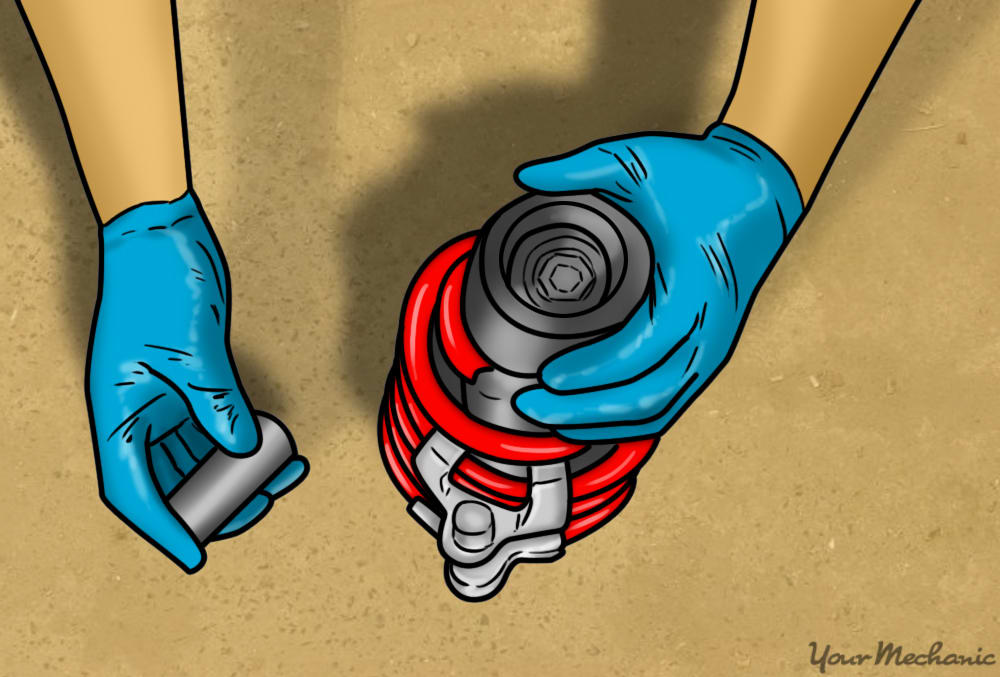
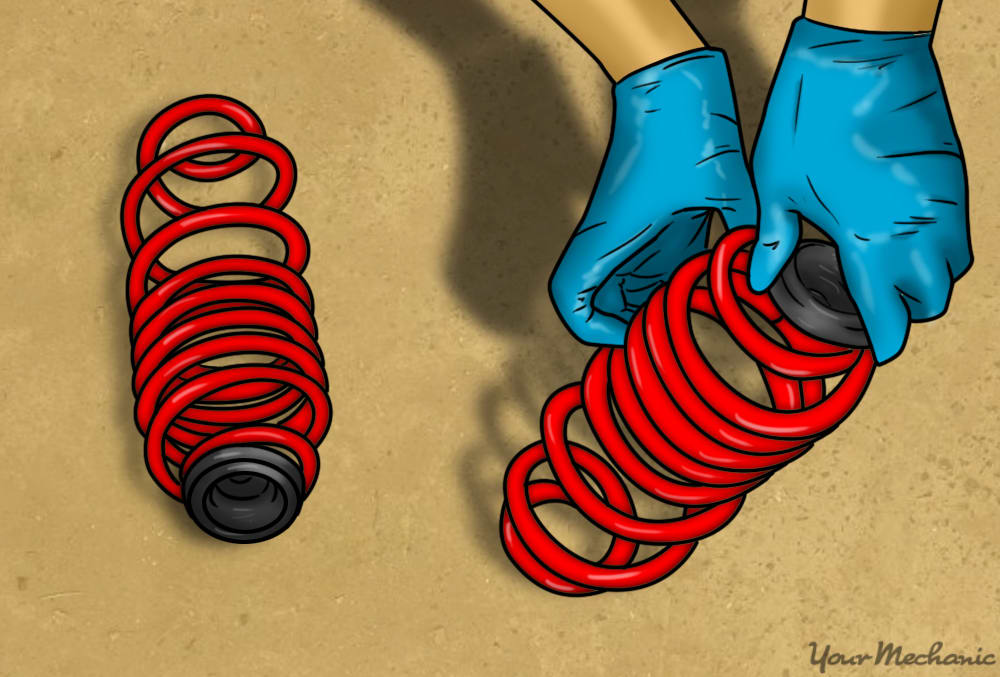
Step 10: Remove the bound from the strut. After taking the jump off of the strut, unclamp the bound compressors so you can use them to afterward install the new springs.
Step xi: Inspect all the mounting pieces. Ensure that none of the mounting pieces shows signs of damage.
Brand sure the prophylactic dampener isn't cracked and brittle, and make certain the bearing still spins freely.
Part 2 of 4: Installing the forepart springs
Stride ane: Compress the new springs. You won't exist able to get the retaining nut screwed on without compressing the springs first.
Same equally before, use 2 spring compressors, each on opposite sides of the jump, and alternate between sides to compress the leap evenly.
Step 2: Place the new spring on the strut. Exist sure to seat the bottom of the leap confronting the groove in the base of the strut every bit you identify the jump on it.
This helps forestall the leap from rotating.
- Tip: Use the lettering on the leap to brand sure you install information technology the right fashion. You should exist able to read the letters on the jump once it's installed, so apply these to make sure it'due south oriented correctly.
Step iii: Reinstall the mounting pieces. Make certain to replace the mounting pieces in the same style you removed them. Otherwise, the assembly may accept trouble rotating.
Step 4: Replace the retaining nut. Outset screwing in the retaining nut by hand.
Once you tin't turn it with your hand anymore, use a wrench or an touch on gun to tighten it down further.
Remove the spring compressors to fully tighten down the retaining nut to the correct torque specification.
Step 5: Place the strut back into information technology's mounts. You're at present ready to put the strut back into the motorcar with the new spring.
- Tip: Use the jack to aid support the weight of the suspension and lift up the whole assembly so you can line upwards the holes.
Step half-dozen: Supercede the elevation mounting nut. Line up the top of the strut with it's mount. Once the screws are lined up, outset installing the mounting nut or nuts by hand to help concord the weight of the strut while you line up the lesser.

Step 7: Replace the bottom mounting bolts. Line upward the bottom mounting holes and insert the bottom mounting bolts.
Tighten them down to the right torque specification.
Step 8: Torque down the superlative nuts. Go back to the top mount and tighten the nuts down to the correct torque specification.
Pace ix: Repeat with the other side. Information technology volition be the same process to replace the other side's spring, so just echo Parts 1 and 2 on the other front spring.
Part three of 4: Removing the rear springs
Step 1: Support the rear wheel hub. Like y'all did with the front end, you will need to support the wheel hubs and so they don't autumn when we remove the bolts on the shock absorber.
- Tip: Since we've already finished with the front end interruption, yous can put the front wheels dorsum on and utilise the jack stands to help back up the rear.
Pace ii: Remove the nuts on the stupor cushion. Yous tin remove the basics at the superlative that hold the daze to the body or the commodities at the bottom of the stupor that connects information technology to the control arm.

Step iii: Pull out the spring and any mounting pieces. Have out the bound and remove its mounting pieces.
There should exist a rubber dampener and maybe another slice to help seat the spring at the bottom.
Brand certain to fix them bated to be afterwards transferred onto the new bound. Inspect these pieces for damage as well.
Part 4 of 4: Installing the rear springs
Step one: Install the prophylactic dampener on your new spring. Brand certain you put the rubber dampener on the right side of the spring.
Install any other mounting pieces as well, in the order that they were on the sometime spring.
- Tip: As with the forepart springs, if you can read the writing on the leap and so information technology is oriented correctly.
Step 2: Place the jump in the bottom seat. Prepare the spring so information technology's in place for when yous raise up the hub and reconnect the shock absorber.

Step 3: Jack up the wheel hub. In social club to line up the shock absorber with the mount, you can jack up the rear bicycle hub.
The jack will go along the hub supported while y'all get the nuts started by hand.
When lifting the hub and lining upwards the daze absorber, brand certain the leap seats properly at the top. There is typically an indent on the frame that prevents the leap from moving around. Brand sure the rubber dampener goes around the indent.
Step 4: Tighten the nuts to the right torque specification. Once everything is lined up and positioned correctly, tighten the nuts for the rear daze to the correct specifications.
- Alarm: You never want to overtighten basics or bolts as this stresses the metal, making it weaker, especially with break components that receive hard knocks every twenty-four hours.
Step 5: Echo with the other side. It will be the same process to replace the other side's spring, so simply echo Parts 3 and 4 on the other rear spring.
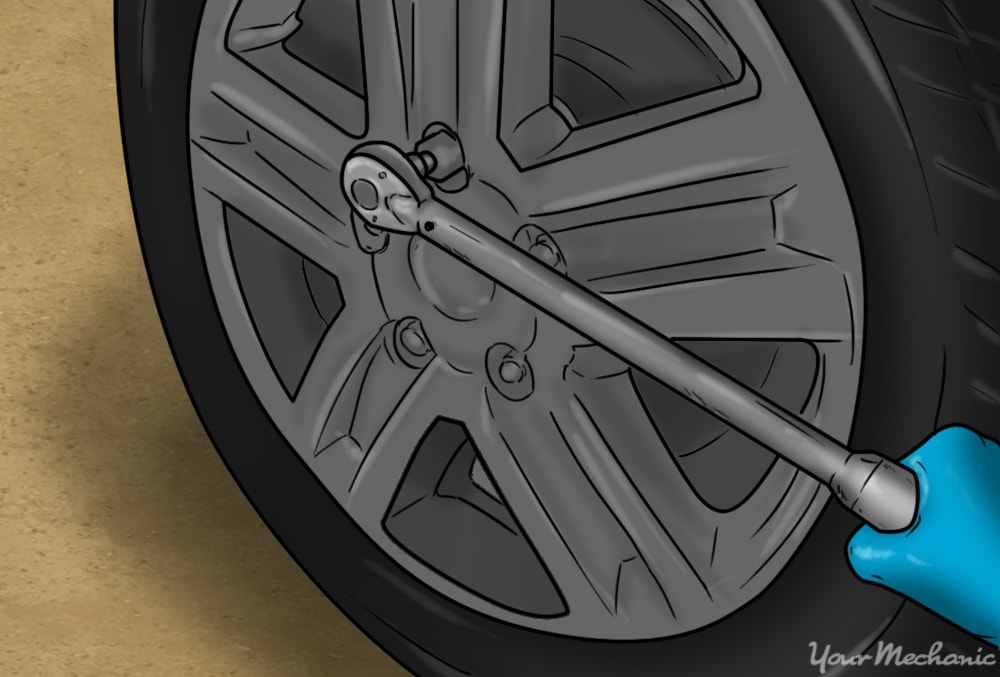
Stride half dozen: Put the wheels back on. At present that the new springs are installed, yous tin can re-adhere the wheels.
Brand sure they are tightened to the right torque specification.
With the break and wheels dorsum on, you can lower the automobile back downwardly to the ground as well.
Pace seven: Go for a short drive. To test out the new suspension, take your car for a bulldoze.
Outset with residential streets and take it slow. Yous want to let the springs and other components seat before you practise any quicker driving. If everything seems okay after a few miles, then the interruption has seated properly.
With the new springs installed, your car is now fix for the track or car prove. Continue in mind, if you're handling doesn't feel normal during the test drive, y'all should stop and have a professional person, such equally one of the certified technicians at YourMechanic, inspect the components to brand sure everything was installed correctly. If you do not feel confident installing new springs on your ain, you can also have one of the technicians at YourMechanic perform the replacement for you.
The statements expressed above are simply for informational purposes and should be independently verified. Delight encounter our terms of service for more details

Source: https://www.yourmechanic.com/article/how-to-install-aftermarket-springs-by-spencer-cates
Posted by: stahlevisiou.blogspot.com
0 Response to "How To Install Shocks And Springs"
Post a Comment